From Xavier: As an filmmaker I can't stress enough how important it is to make a detailed binder that completely encompasses your entire film. One of the problems you get with people who are creative is the fact they come up with amazing ideas, but they can never make it a solid, tangible package.
They're too busy making one awesome idea rather than building an entire story. It's cool to have a gimmick or set up the story is based around, but without a good story you have nothing. When it comes to film, you really need to have everything planned out even to the most minute detail.
Many filmmakers rush a film without planning the logistics and fail. Here are two rules you can live by.
1. A scene will always take longer than what you predict
2. It's not if a mistake will happen. It's when.
This is why you want to be as organized as possible. So I want go over how I make a production package.
1. Actor's Info, Crew Info, Location Info, Prop Info, Contracts (Actor's Release, Location Release, etc...)
2. Script
3. Shot List
4. Storyboard
5. Floor Plan
6. Scheduling
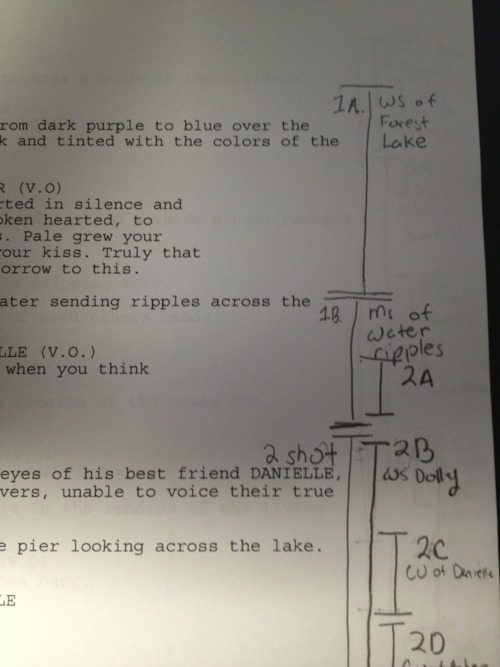
7. Shooting Script
8. Visual References
9. Revised Pages
10. Equip List
11. Miscellaneous
This may seem overboard, but I'm going to explain each one and why you should do it.
First, get notebook dividers that have numbered division. You can also get colors, it doesn't matter. Just make sure to buy enough to throughly divide your work.
Before I begin on the first page.
I have one lone page that has my logline, a short description of the film (two paragraphs usually), and then a story summary (around four to five paragraphs).
You need to be able to explain your film in one sentence or in a few paragraphs. In the story summary write out your first act, second act, third act, and conclusion. Do not skip over a part of your story you are unsure of. If you have not figured it out in your summary, you probably haven't fleshed it out in your script.
1. The first divider will be for all of the actor's info, crew info, contracts, location info, and props. As you are looking for actor's and locations write down who the person is or who owns the location. Write down all the props you'll need to buy for the film.
This will help you to keep everything you are doing at the beginning of pre-planning in check. Be sure to get Actor Release Forms and Location Release Forms to avoid legal trouble. You can find pre-made ones anywhere online.
2. This is a no brainer. You must have a script before shooting a film. Don't wing it. Don't say I have it all in my head. You don't!
You are going to waste someone's time if you don't put it on paper. When you write the script follow proper screenplay format. Download screenwriting software, Celtx.
Have someone else read your story. You will always be bias to your work. You will always think it's good when it might be a polished turd.
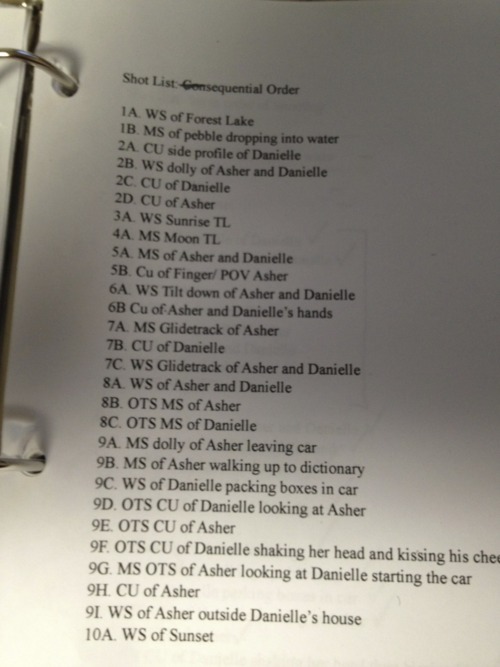
3. Your shot list covers all of the shots you will need in your film. This ties in with your storyboard. You might end up doing them both at the same time or one before the other. It's based on you, but I recommend doing your shot list first.
Go through your script and visualize every scene (how you place your characters, where do cuts happen, movement, etc...) and write out what it would look like.
Ex.
Scene 1A - Medium Close Up of Emma sighing and reaching for pen
Scene 1B - Close Up of hand reaching for pen
Scene 1C - WS of Emma picking pen up then standing up and walking out of room
Scene 2A - WS of Emma walking out of room and into hall
Shot List in Sequential Order
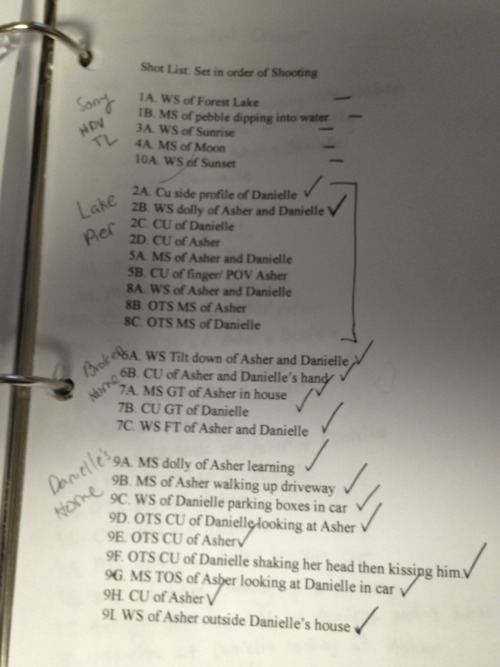
Shot List Based on Scenes we will shoot based on availability of actors and locations
(this is a Shooting Schedule, when you add times that each shot will be filmed!)
Those were a little more detailed than what you'll need, but it's your preference. Go through your entire script and figure out how many shots you'll need and list them by scene, then in order alphabetically.
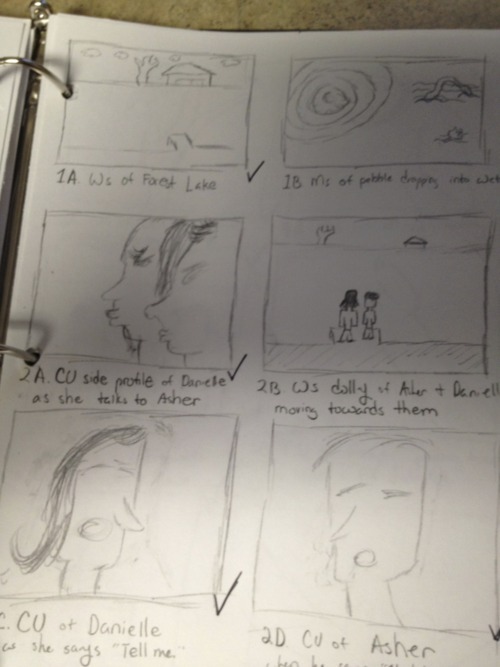
4. Your storyboard is the visual representation of your film. It is (in my opinion) one of the most important parts of understanding your film's aesthetic. You may say, 'Well I can't draw."
Tough luck, draw stick figures because you NEED to do this. If you're ashamed of your drawing skills sit down with someone who can help you visualize. This will be tedious and time consuming. Do it. You will thank me later.
5. So you've figured out your shots and have a decent storyboard. Cool, during this time you should be out scouting location.
Take a camera with you and photograph all angles of the location. If you don't have a camera handy (YOU SHOULD! Why don't you have your own camera! You love film don't you! Eat Ramen Noodles and save up those pennies!) take the photos with your phone.
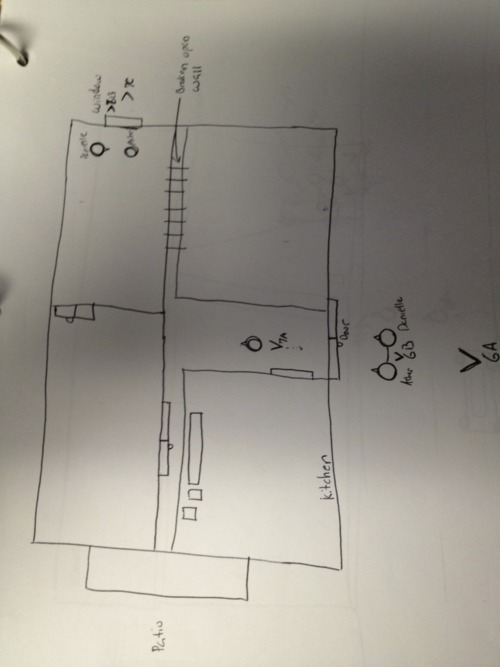
Once you have the pictures it's time to make an outline of the location from a bird's eye view. Account for tables, chairs, extra rooms, etc...)
You'll notice that ovals with small triangles on them and V's on the paper. The ovals represent the actor's blocking and the small triangles represent his nose. This is so we know where the actor is facing and the direction of camera's shot.
6. I did not put anything into the binder for scheduling since I constantly updated scheduling through email and Google Docs. Once you have locations and actors you're going to need to figure out when they are available. You also need to know (based on your script) what time of the day you want certain scenes to be shot.
You will then need to coordinate with your actors and crew for Crew Call (when the crew must be at the location) and Actor's Call (when actors must be at location), what days and times you'll have certain actors, what days and times you'll have certain locations, and (based on the previous) when you can shoot certain scenes.
I've done this on my own several times. I don't like it, so I usually work with or hire a Producer (individual who handles the non-creative logistics such as telling actors where and when to be, figuring out your film budget, etc...) who will look over all of this and figure it out for me.
A Producer is invaluable. Even in college, if you want to have a smooth film, you should go ahead and link up with individuals who take themselves seriously, and enjoy brining a film together on the business side.
7. This one is pretty simple. Remember when I told you to visualize how each scene in your script will happen shot by shot? Now, put your shot list on the side of your script by where it corresponds with the script. Do this to your entire script.
8. Visual References are just pictures, notes, poems, or anything that embodies the aesthetic your film is trying to achieve. For this pre-production package, I wanted a sense of destruction counteracted by the beauty of nature (specifically a lake). Here are two of my visual references.
9. NEVER throw away anything. Even when you are done with it you never know when something may fall out or you forget an updated script or shot list. At least if you have your old work you can go back and try to remember what you revised. Never throw away anything you've written.
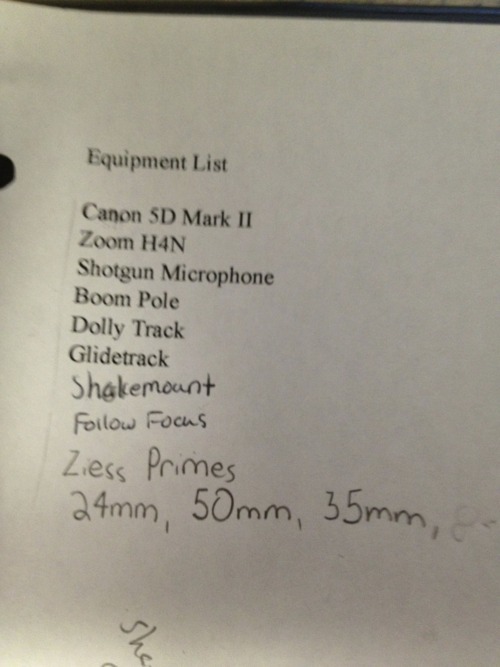
10. This one is straightforward. Just write out the equipment you feel you will need to finish this project.
(Dr. Raimist Note: it is spelled ZEISS!)
11. Finally, anything else that doesn't fit into these categories will go into Miscellaneous.
That's a full production package. Next time you shoot a film take out the time to make something extensive and detailed. If you think this is overkill, I assure you you're going to have a hard time making your vision come to life.
Film Made With Production Package Shared Above:
Feel free to contact me for any questions at quethelights@gmail.com.


